
Copy, print and scanning
In the library you can use three multifunctional machines Aficio that integrate the copy/print machine and scanner. See the manuals for- copying/printing
- canceling print job sent to a printer
- scanning to email
- scanning to folder
- price list
Copying and printing
Principle:At first put your money in your SUPO account, namely in cash or by bank transfer. If you want to print a document, send it to one of the printers (copiers) – B&W or colour. After it place your ISIC card to the card reader on the machine and print or copy.
Step by step:
For all about SUPO system see INET MU (the same login as to IS).
The account has to be activated by client in an electronic way by confirming the Client's Consent with the Running Conditions of the SUPO System:
Inet » MU Economics » SUPO » Client's consent with MU SUPO running conditions
After reading conditions and confirmation your account will be activated. Your account must be at least 50 crowns for full use of SUPO.
Data for bank transfer (account number, variable symbol) is available in Inet or you can put money cash in your SUPO account by
self-service top-up machine,
which is located next to the color copy machine on the ground-floor.
Note: When you put in self-service top-up machine more than 100 crown, copy machine display shows only 100 crowns.
Don't be afraid and control your account in INET MU.
Printer basic configuration:
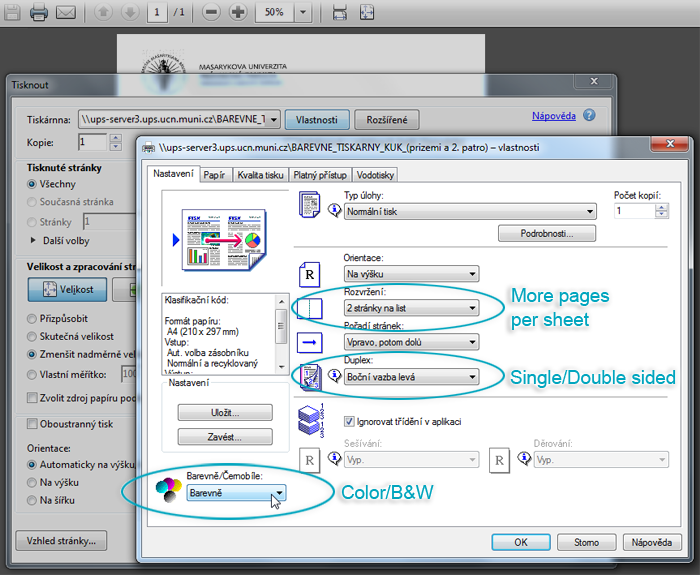
Copy configuration:
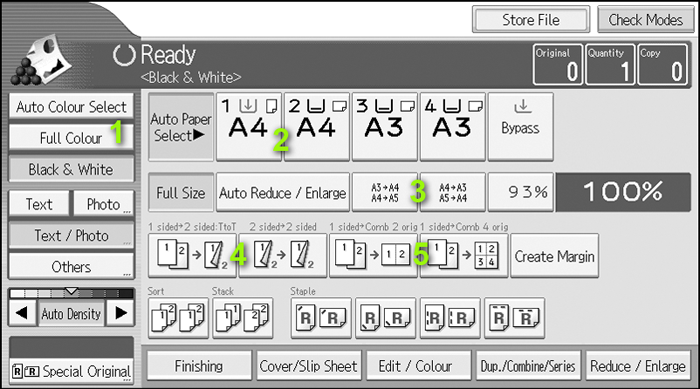
- B&W / color copies
- paper format settings
- reduce/enlarge settings
- double-sided copying
- more pages to one page
Price list
| Prices in CZK | Copy | ||||
| Black and white | Coloured | Black and white | Coloured | ||
| A4 | single-side | 1,50 | 8,00 | 1,60 | 8,10 |
| double-side | 2,80 | 15,80 | 3,00 | 16,00 | |
| A3 | single-side | 3,00 | 16,00 | 3,20 | 16,20 |
| double-side | 5,80 | 31,80 | 6,20 | 32,20 | |
How to cancel a print job already sent to a printer
For checking jobs/documents you have sent to a printer, or in case you want to cancel some of your print jobs, type into the internet browser address line "pserverukb". You will be redirected to a web interface in which you can log in using your UČO number and secondary password. Then you can cancel selected print jobs as the image shows.
Scanning
On the machine you can scan your material into PDF file that you can send to an e-mail..
- First switch the language to English: and then press English at the display.
- On control panel press the button „scanner“:
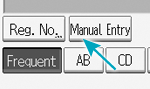
- Press the button „Manual entry“ on the display
 ,
enter your email address and press „OK“.
,
enter your email address and press „OK“. - Clear and not creased sheets of paper insert into the feeder. Other material put on the glass:
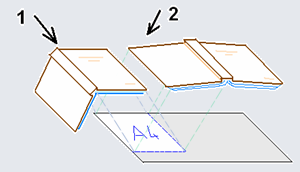
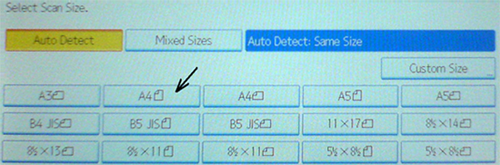
If necessary, press „Scan settings“ and set the scan size – for example A4. Scanner will not scan the whole width of the book on the glass, just only one page (see picture above).You can set also other parameters of scanning: color/black&white, resolution (200 DPI is enough for text scanning).
- For scanning press the green button.

- If you want to send scanned pages to your email address (PDF file), press the button „#“

- If the scanned file is available to send because of its size, scanner will alert you and and offer sending email.
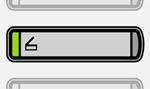
Than you can continue with scanning. - Before leaving the machine, you can press the button
 for clearing your email address from the display.
Sending Scan Files to Folders
The size of the final pdf file is not limited in case of using this function, as it is by scaning to email.Then, manipulation with more pdf files is not necessary in case of larger volume of scanning.
Attention: Files in your network folder will be deleted after 48 hours.
|
1) In the scanner mode, switch to the Scan to Folder screen. 2) Press the "Manual entry" button. | 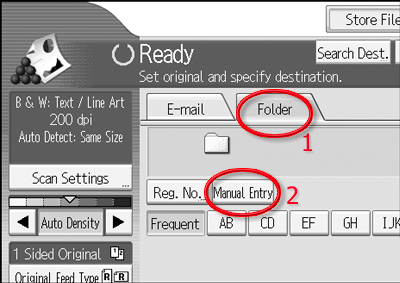
|
|
3) Enter \\pserverukb\YOURUČO as the path of destionation folder. 4) Put your UČO number as the user name. 5) Insert your SECONDARY PASSWORD as the password. Press OK, make other scanner settings (color and quality of scanning, resolution, format of scanning) and start scanning. Finish scanning with the blue button (#). | 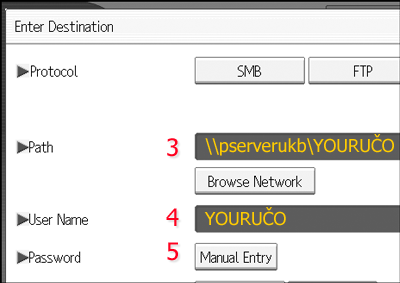
|
| Final PDF file is available in the library student computer after inserting: „\\pserverukb\YOURUČO“ into the „This computer“ window or into the address input of the Internet Exploreru. | 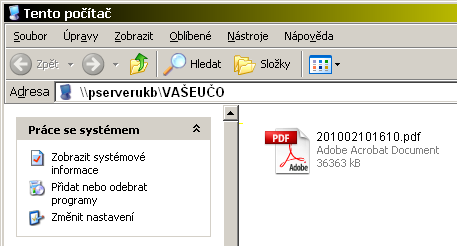
|
| Screen pictures are assumed from materials by the Ricoh company. | |